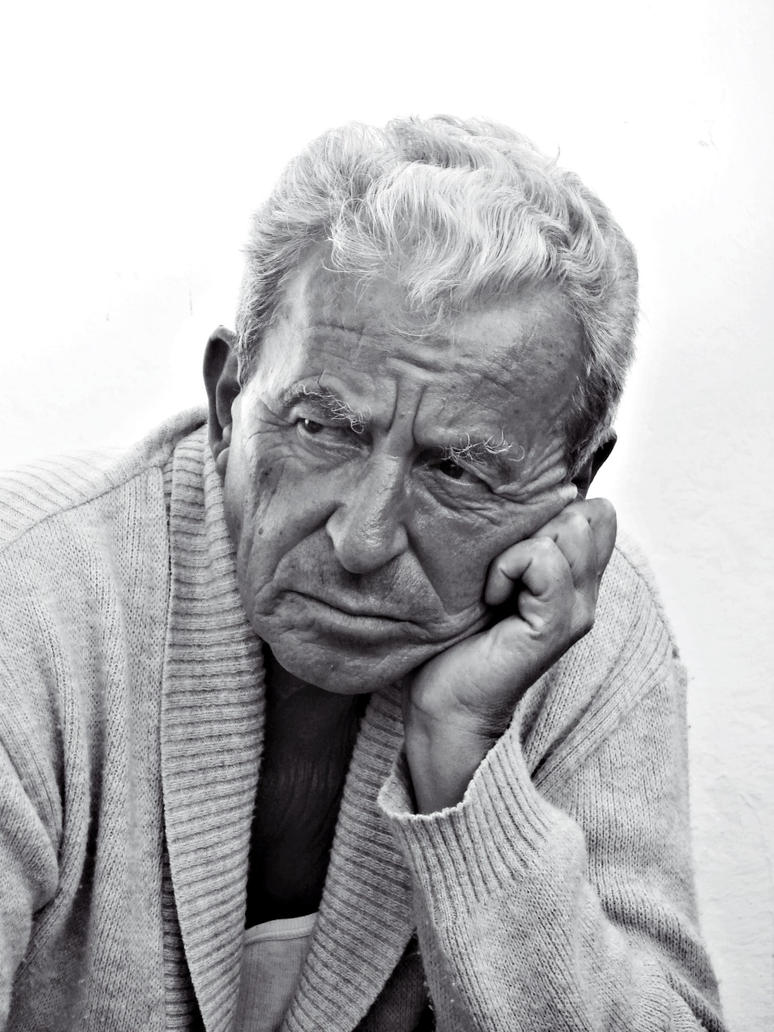
Open and add an image file you
wanted to use for this tutorial. (I'm using an image from http://th03.deviantart.net/fs70/PRE/i/2009/344/2/1/Old_man_by_Turtle_poetique.jpg)
By using the Pen tool, we have
to crop away the background areas of the picture.
Click on the image layer on the Layers tab, then go to Image > Adjustments >Posterize. Set the Levels to 7.
Hide the Image layer and the Background layer for awhile, to do so, click the Eye icon on the left beside the layer.
Press T or the Type tool, select your favorite font and set the color into black (#000000), type some word you wanted to appear on our project. I only type the word, "ALONE" using Impact font for this tutorial.
Now we are going to create a
Photoshop brush. To do so, simply make a selection around the word like
what I did by using Rectangular Marquee (M) Tool. Go to Edit > Define Brush Preset. There you have it! Do the right-click thing on your blank document and your new
brush (ALONE) will appear under your Brush Preset window.
We have not much use for the
words layer anymore so you can hide it away. Unhide the Image and Background
layers again. This time make a small selection around the black area like what
I did on his shirt.
With that selection, go to Select > Similar. This will select all the areas with that particular color.
With that selection, go to Select > Similar. This will select all the areas with that particular color.
Before I go on further, try to
select the Brush tool (B) and by pressing ([ or ]) to adjust Brush sizes. But
to learn further, right-click on any part within the document for it is the
shortcut for changing Brush sizes and its type.
Hide the Image layer, leaving the selection loaded. Create a new layer and start to stamp around with the Brushes you created earlier.
Let's add some adjustment on our brush by clicking the Brushes icon on the right side.
Under Brush Presets, click Shape Dynamics>Size Jitter: 71%, Control: Pen Pressure, Minimum Diameter: 3%, Angle Jitter: 25%, Roundness Jitter: 0%, Control: Fade:25, Minimum Roundness: 100%
and Scattering>Scatter: Both Axes> 1000%, Control: Pen Pressure/Count: 12, Count Jitter: 27%, Control: Fade:8.
What you need to take note is to adjust the sizes before you stamp so it fits nicely within the selection. Do a few times with the [ & ]+clicking—size adjusting and stamping. Very soon you will get the hang of it.
Repeat these steps for the other tones of grey color in the Image layer and try to adjust the Brushes Preset of your choice.
This is roughly how you should
get as your finished work.
Although the black-and-white
style already looks great for me, you can also add a Hue/Saturation1 and
replace the colors to your personal preferences.
Hope you enjoy this tutorial. Have fun!
Don't forget to leave a comment...
Hope you enjoy this tutorial. Have fun!
Don't forget to leave a comment...


No comments:
Post a Comment